Strange Wildlife Camera Photos

Strange Wildlife Camera Photos

Looking for some odd wildlife photos captured using trail cameras? Well, this is a good place to start! Below are some of the most crazy game camera pics I have seen to date. The great thing about motion-activated cameras is that you never really know what you are going to get. Enjoy these strange photos and if you have any of your own, send ’em over!

Strange Wildlife Camera Photos
Strange Wildlife Camera PhotosStrange Wildlife Camera PhotosStrange Wildlife Camera PhotosStrange Wildlife Camera PhotosStrange Wildlife Camera PhotosStrange Wildlife Camera PhotosStrange Wildlife Camera PhotosStrange Wildlife Camera Photos

Digital Game Cameras – Importance of Effective Flash Range

Digital Game Camera - Importance of Effective Flash Range

The flash of a digital game camera can be an important thing to consider when looking for a new trail camera. The most obvious reason is because deer move most frequently after darkness settles in. The flash of your camera must be strong enough to cover the subject area, but no so strong that it causes “white out” on the pictures. A good starting point would be to research the “effective flash range” as stated by the manufacturer of all the trail cameras in your price range. And remember, these are still “stated” ranges.

If you plan on using the trail camera on the edge of a crop field you will most likely need a longer effective flash range than say 20 feet. On the other hand, if you set up the deer camera over a bait pile in heavy brush, then a short flash range will be all you need. Why? Well first, the solid background of brush will reflect light back into your picture, so the short flash range works fine. And obvious, the deer will be much closer because of the confined space.

Conversely, the distant tree on the other side of the agricultural field will need a much brighter, more effective flash. Regardless of where your trail camera goes, make sre to clear out the area between the camera and where you expect the deer to be. The most obvious reason (coming from a seasoned camera user) is because if the camera is set out during periods of high temperature then even minor moments in brush and weeds in front of the game camera could trigger “false” pictures. This close brush will also cause “flash back,” resulting in “white out” of your night photos as well.

“Flash back” can be spotted on your scouting photos as looks like a very hot spot on the game camera photo that may or may not be bright enough to white out the entire photo. In short, if you have brush, dead limbs, weeds, or other obstructions close to your digital game camera’s flash, cut it down.

And lastly, when purchasing your scouting camera, make sure to research the available cameras to find one that meets your needs. And of course, price varies based on picture size, opitical quality, memory, options, and effective flash range. Do a little scouting before your camera does some scouting and you will get the deer photos you want without the headache.

Justin Hurst Wildlife Management Area – Info

The Texas Parks and Wildlife Department wildlife management area formerly known as Peach Point Wildlife Management Area (WMA) will be formally rededicated this Friday, Oct. 12 as “Justin Hurst WMA” in recognition of the former game warden and wildlife biologist who was killed in the line of duty earlier this year. As a department biologist in the Wildlife Division, Hurst devoted six years to the 15,612-acre WMA known for its lush wetlands and coastal plains.

As Peach Point’s area manager he was instrumental in the development of many waterfowl conservation projects on the site, including mottled duck research. Hurst switched careers and became a game warden in 2002, and while at the training academy, he shared his knowledge about waterfowl with fellow game warden cadets and taught duck identification.

On March 17, Hurst’s 34th birthday, he was killed while attempting to apprehend a suspected poacher. Employees are invited to attend the rededication, which begins with self guided tours of the WMA from 8 a.m. to 1:30 p.m. Ceremonies begin at 2 p.m. and conclude around 4 p.m. Speakers will include Mike Berger, Col. Peter Flores, Todd Merendino, David Lobpries, Jesse Oetgen, John Thorne, Andrew Sansom, Amanda Hurst and Robert L. Cook.

Get more information by calling Texas Parks & Wildlife’s Bay City office at (979) 244-7697.

Parrie Haynes Ranch – Celebration of History

The Friends of Parrie Haynes Ranch has arranged to have more than 200 young people attend an event on Saturday, October 13, 2007 to mark the 50th anniversary of the passing of Parrie Haynes, who donated the property near Killeen that eventually became a Texas Parks and Wildlife Department outreach facility.

Parrie and Allen Haynes were married in 1895 and started working as tenant farmers. Through hard work and determination, and by saving and living a frugal life, they eventually built a modest cattle empire. After Mr. Haynes died in 1953, Parrie took over the ranch. The Haynes were very fond of children, but were childless. So, upon her death in 1957, Mrs. Haynes bequeathed $100,000 to the Killeen School district for scholarships, and donated about 4,500 acres of her beloved ranch to the Texas Youth Commission to serve “the orphans of Texas.”

In 1993, the Stae of Texas, specifically Texas Parks and Wildlife Department, in partnership with the Texas Game Warden Association, leased Parrie Haynes Ranch to establish camps for children. In 2003, the Camp Coca Cola Foundation (now the C-5 Foundation) generously added new facilities at the ranch which are used for their summer residential camping program. Today, the Communications Division manages the ranch as a youth activity, conference, and equestrian facility open to groups on an advance-reservation basis. This Saturday from 10 a.m.- 4 p.m. youth will fish, nature walk, ride ponies and enjoy other activities at the 50th anniversary celebration. At 2 p.m., the friends group will unveil a new stone pedestal and marble plaque dedicated to Parrie Haynes’ legacy.

Scoring Deer on the Hoof – TrophyScore Product Review

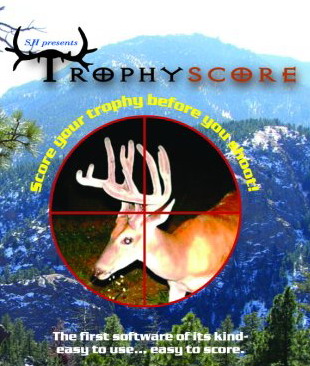
TrophyScore is a great new software program that allows digital game camera users to download their whitetail photos and then, using TrophyScore, measure the animal to give the user a reliable estimate on its trophy score. This program will allow hunters to rough score their deer before they shoot. We’ve posted the TrophyScore Review here.

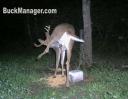
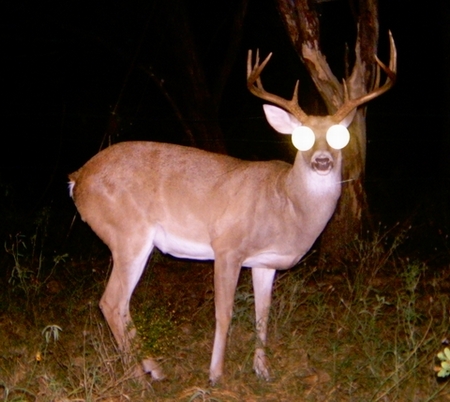
My CamTrakker game camera came with the software for the TrophyScore program. After we recovered Roy’s 10-point buck I installed the software onto my computer and I scored the buck with TrophyScore. This was a perfect opportunity to use the program and see how accurate it was.

Here is How it Works

When you open the program you select a picture of the buck you want to score from your digital images.

After the picture is loaded your first step is to give the program a reference to base all the measurements on. You have the choice of measuring the buck’s eye or its nose. To do this you use our mouse and click on the edges of the eye or nose. The instructions display as you move through the program and are available to guide you along the way. The instructions state that to measure the eye you mark the edges of the eye, without getting into the skin.

You can Zoom In and Out on any feature and I found it was easier to get an accurate measurement of the eye by zooming in on an eye to measure it. I clicked on each edge of the eye and a line filled in between the two points. Then the program asked me if I had measured the eye or the nose and I of course selected eye.

You only measure one, either the eye or the nose. If your picture has a front view you can see all the nose and get a good measurement. But from the front, the eye is at an angle so your measurement won’t be as accurate as a profile shot. On a side view you can not see all the nose but you can see all the eye.

Onward, here is how to measure the nose. At this point the screen shows you how to make the measurement and you click on the sides of the nose, from inside nostril edge to inside nostril edge.

Next, it’s time to measure each antler beginning with the right antler. First you click along the right main beam. When it is marked you click Next. You then measure the length of each tine, one at a time beginning with the brow tine. When you’re done with the right antler you do the left. Then you measure the width of the antler at the base and between the points. Lastly, you measure the spread of the antlers and click Next. The program tells you it is ready for Completion and when you click Next you receive a print out of the rough Boone & Crockett score, including both gross and net scores.

How Easy Was It To Do This

My first time through I didn’t know what to expect. I didn’t zoom in on my nose measurement and didn’t get it right and the buck scored over 160. But on my second time around I knew what was going on and took advantage of the zoom feature — then the program nailed the score. TrophyScore actually adjusts to the angle of the deer in your photo by the relationship of the eye or nose measurements to the antler measurements.

So was it easy? Yep. Accurate? That too!

Roy’s measurements with the tape were half an inch more. The TrophyScore grossed the buck at 131.2″ and the it taped 131.7. That’s incredibly close. The TrophyScore web site has full information on the program and you can download it from the site.

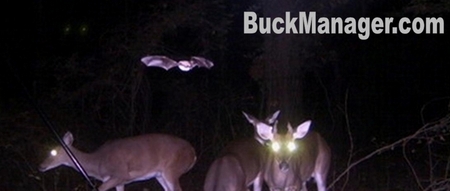
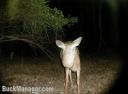
Will it work on live deer? Yep, that is what it was created for!

This article was adapted from www.Bowhunting.net Check out the rest of this story here.